
How to build a redundant configuration combining EC2 and ELB
Introduction
In the increasingly demanding modern era of web servers, building a reliable Web Server cluster is an essential element for the efficient operation of web applications. In this manual, we will provide detailed step-by-step instructions to help even beginners smoothly set up a Web Server cluster.
Construction Procedure
(1) Building Web Servers
First, create four EC2 instances as Web Servers. Connect to each Web Server using Tera Term and perform the following command operations:
①Switch to the root user:
sudo su②Install Apache:
yum -y install httpd③Create a HomePage (Enter any desired HTML content for the HomePage and save it. To verify, input different content for each server.)
vi /var/www/html/index.html④Start Apache:
systemctl start httpd⑤Enable Apache to start automatically:
systemctl enable httpd(2) Creating an Application Load Balancer (ALB)
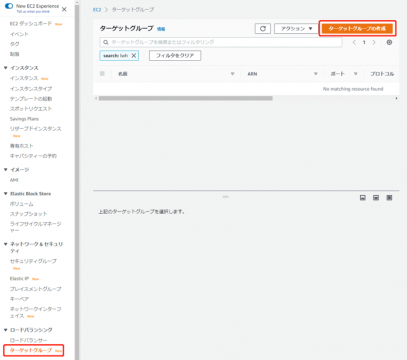
From the Amazon EC2 dashboard, click on “Target Groups,” then click on “Create Target Group” in the upper right corner to navigate to the target group creation screen.
Select “Instance” as the target type. Set a name for the target group, choose “HTTP” as the protocol, and set the port to “80.” Next, select the appropriate VPC and click “Next” at the bottom right.

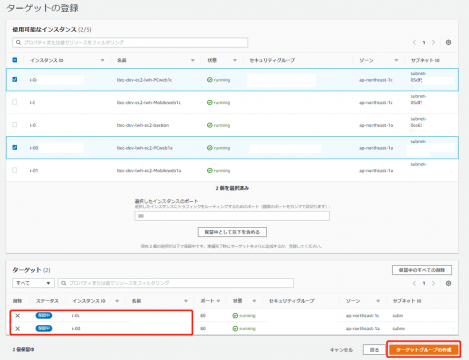
Choose two PC Web Servers, click “Include as pending” and add them as targets. Once added, click “Create Target Group.” Similarly, create a target group for Mobile Web Servers.
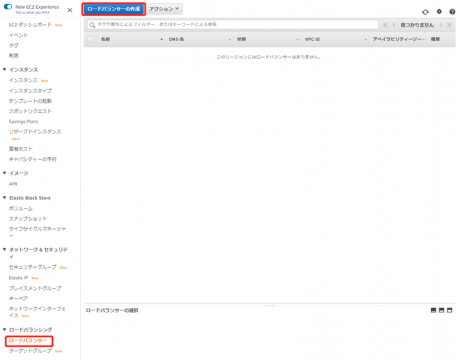
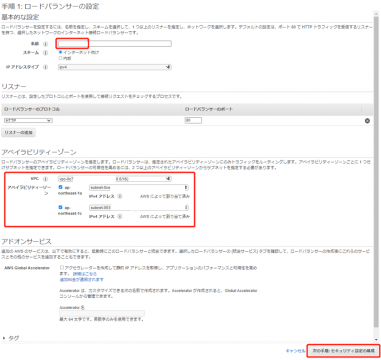
From the Amazon EC2 dashboard, click on “Load Balancers,” then click on “Create Load Balancer” in the upper left corner to navigate to the load balancer creation screen.
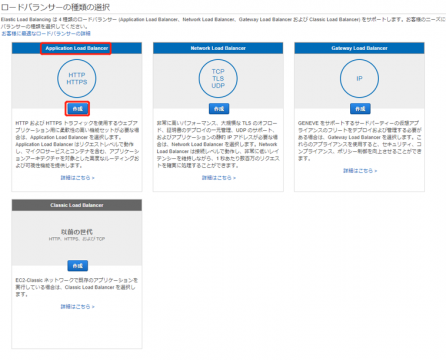
Click the “Create” button for Application Load Balancer.
Set a “Name” and choose the relevant VPC for “Availability Zones.” Select two Public Subnets. After selection, click “Next: Configure Security Settings” at the bottom right.
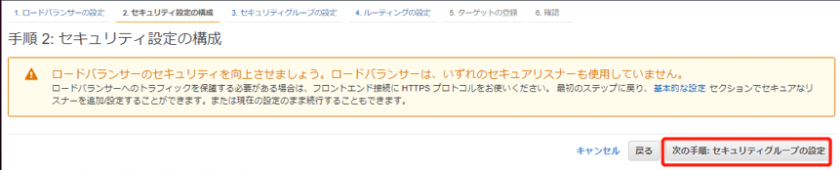
Click “Next: Configure Security Groups” at the bottom right.
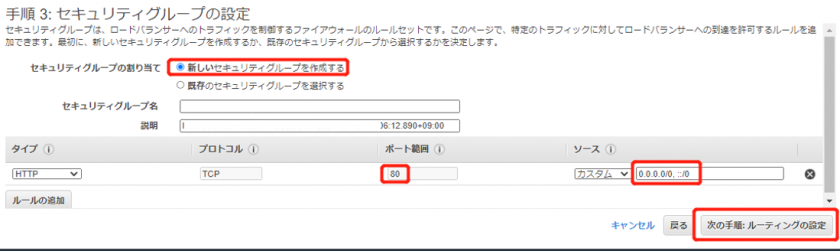
If there’s no security group for the Application Load Balancer, create a new one.
Choose the target group created for PC Web Servers under “Target Groups”. Set a name and click “Next: Register Targets”.
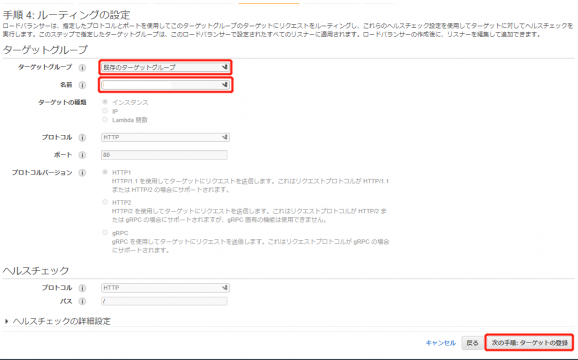
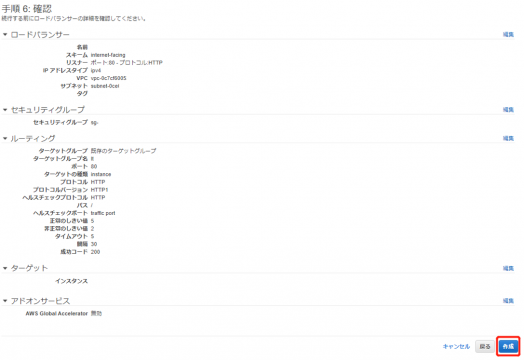
Click “Next: Review”.

Review the details and if there are no issues, click “Create”.
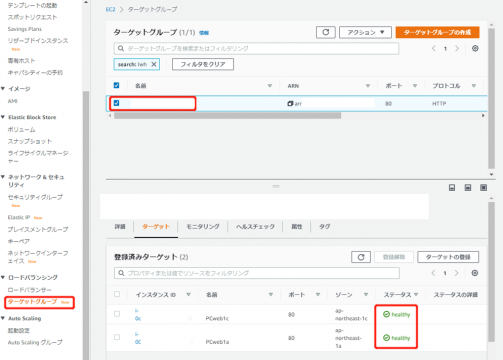
Once the instance status becomes “healthy”, the creation is successful.
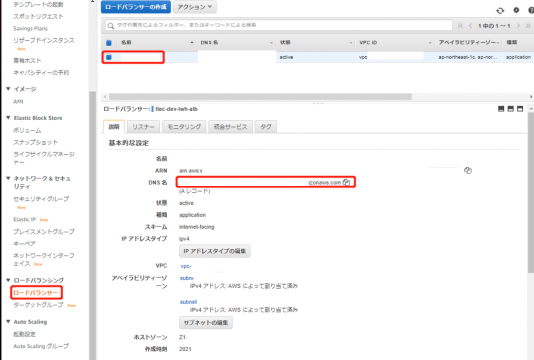
Copy the DNS of the Application Load Balancer and access it through a browser on your PC. Reload the page to confirm that you can access both PC Web Servers through the Application Load Balancer.
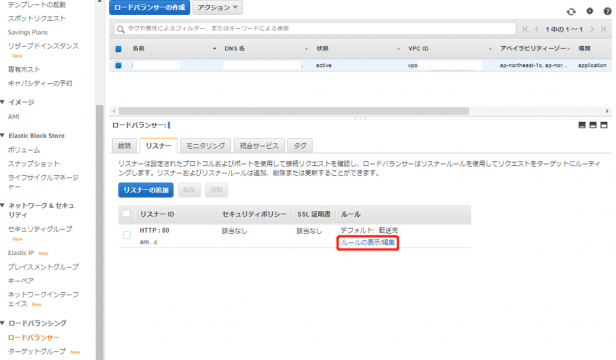
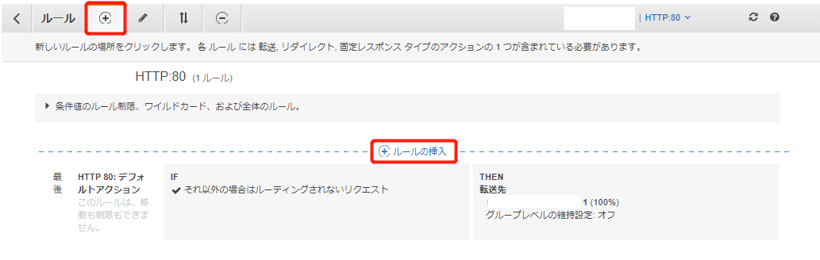
(3) Adding ALB Listener Rules
Click “View/edit rules” at the bottom right to navigate to the screen for adding Listener Rules.
Click the “+” from the upper left and select “Insert Rule.”
Conclusion
In conclusion, this guide provides a comprehensive, step-by-step process for creating a reliable Web Server cluster that meets the demands of modern web applications. By setting up EC2 instances, installing Apache, configuring an Application Load Balancer, and fine-tuning listener rules, you’ve established a resilient architecture capable of efficiently distributing traffic and ensuring seamless user experiences. This cluster not only enhances application performance but also lays the groundwork for scalability and adaptation, positioning you to navigate the evolving digital landscape with confidence and success.

