
How to build an AWS network
Introduction
Today, we will talk about Amazon Virtual Private Cloud (VPC), and how to build one. A VPC is a virtual network infrastructure provided by AWS that allows users to create their own isolated network environment in the cloud. It provides control over network settings, such as IP addresses, subnets, and routing, and enables secure connectivity to AWS resources while allowing customization and integration with on-premises networks.
By utilizing AWS VPC, users can logically group resources and create their own network configurations. This allows for fine-grained control over security and network settings, optimizing the performance of applications and servers. As you learn the steps to create an AWS VPC, you’ll gain the ability to effectively manage your network environment.
AWSネットワークの作成手順
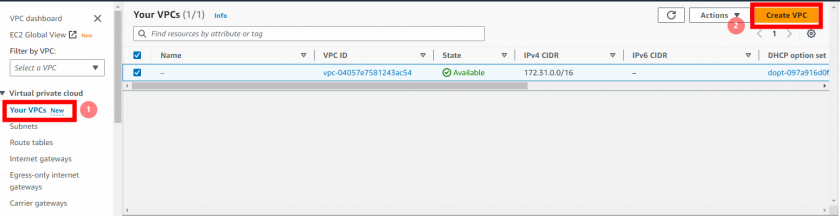
(1) Creating a VPC
Search “VPC” from the AWS management console, then click on “create VPC“.
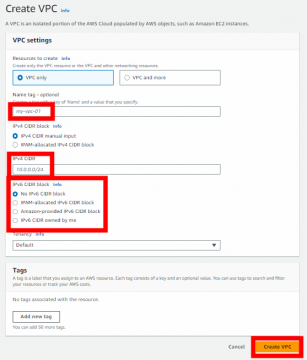
(2) Setting the VPC
Next, let’s move on to configuring the VPC network settings. Set the “Name tag” and specify the “IPv4 CIDR block” according to your environment. Once you’ve made the necessary configurations, click on “Create VPC” to create your VPC.
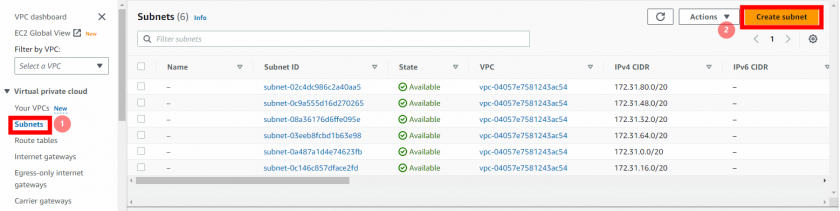
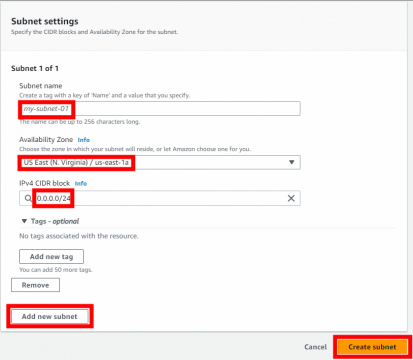
(3) Creating a subnet
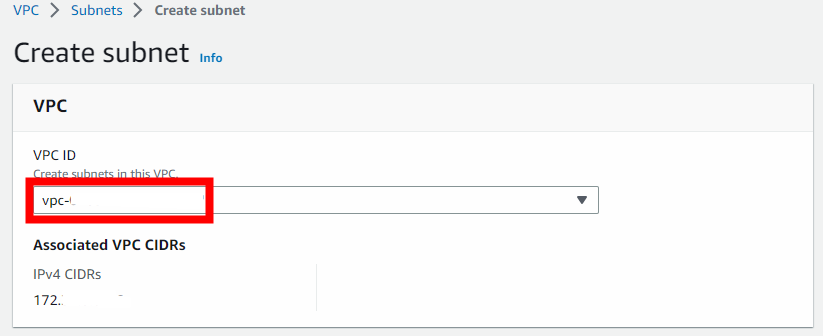
From the VPC dashboard, click on “Subnets” and then click on “Create subnet” at the top right corner. This will take you to the subnet creation screen.
Select the VPC you created in step (1) for “VPC ID.” Set a desired name for “Subnet Name“. Choose the appropriate “Availability Zone” based on your environment.
For “IPv4 CIDR Block“, ensure it is within the CIDR range of the VPC created in step (1) and does not overlap with other subnets. Once you have entered all the necessary information, the configuration for one subnet is complete. (Please create both a public subnet and a private subnet)
If you want to add more subnets, click on “Add new subnet” at the bottom left.
After configuring all the subnets, click on “Create Subnet” to create the subnets.
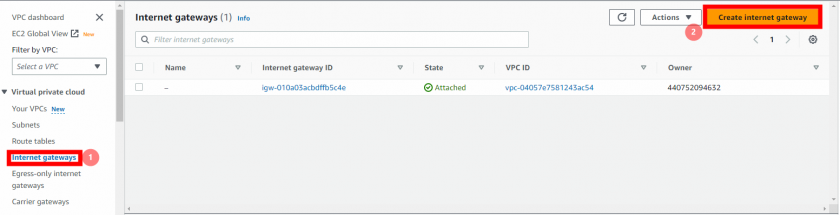
(4) Create and attach an Internet Gateway
From the VPC Dashboard, click on “Internet Gateways” and then click on “Create Internet Gateway” in the top right corner. This will take you to the screen where you can create an Internet Gateway.
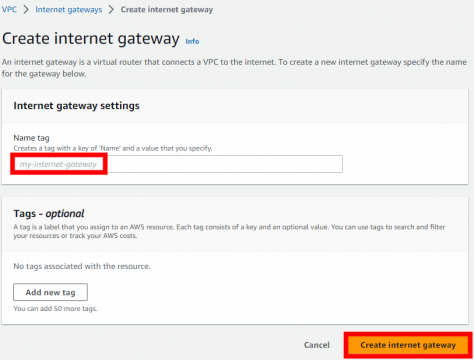
Set a desired name for the “Name Tag” field, and then click on “Create Internet Gateway” to create the Internet Gateway.
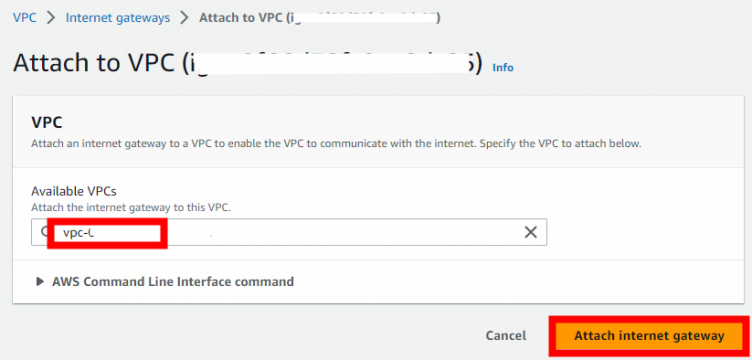
Select the Internet Gateway that you created earlier and click on “Actions“, then choose “Attach to VPC” from the dropdown menu.
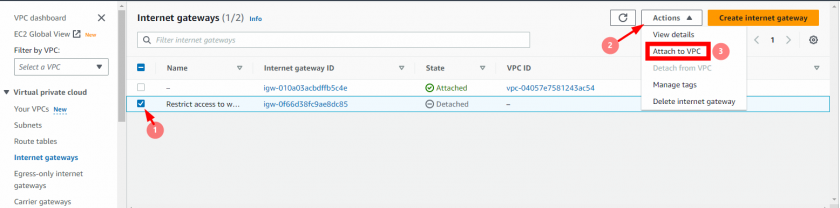
Select the VPC you created and click on “Attach Internet Gateway” to attach the Internet Gateway to the VPC.
(5) Creating a NAT Gateway
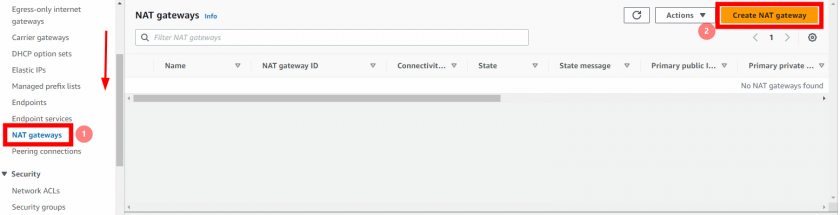
To create a NAT Gateway, scroll down to the VPC Dashboard and click on “NAT Gateways” in the left sidebar. Then, click on “Create NAT Gateway” in the top right corner to proceed with the creation of the NAT Gateway.
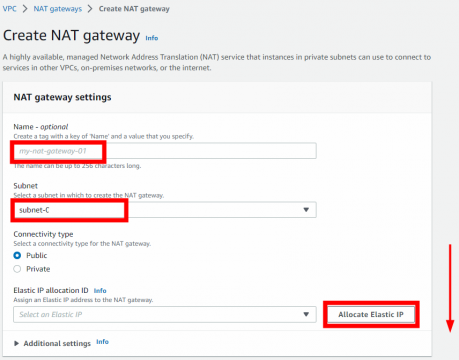
In the “Create NAT Gateway” screen, provide a name for the NAT Gateway in the “Name tag – Optional” field. Then, select the public subnet you created earlier from the “Subnet” dropdown menu.
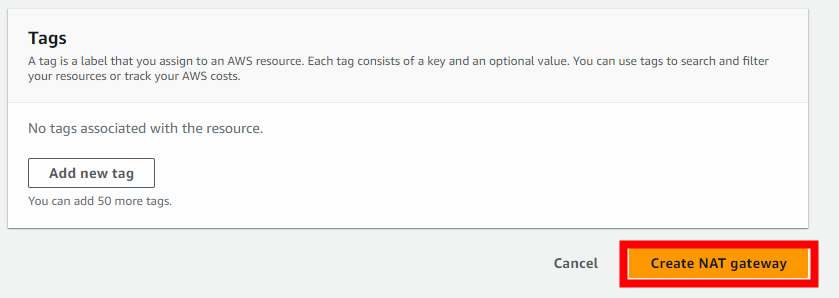
If you don’t have an Elastic IP allocated, you can allocate one by clicking on “Allocate Elastic IP” button. Finally, click on “Create NAT Gateway” to initiate the creation of the NAT Gateway.
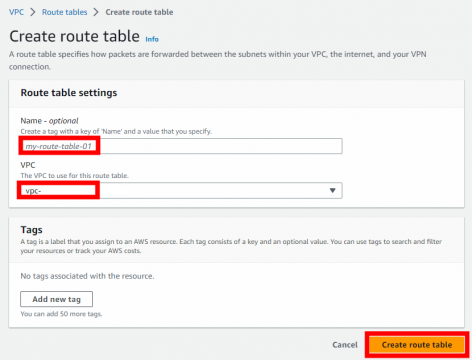
(6) Creating a route table
To create a route table, open the Amazon VPC Dashboard in the AWS Management Console. From the navigation pane, click on “Route Tables.” Click on the “Create route table” button located at the top left corner of the page. This will take you to the route table creation screen.

In the route table creation screen, enter a name of your choice in the “Name tag” field. Select the VPC you created in step (1) from the “VPC” dropdown menu. Once you have completed all the necessary settings, click on the “Create” button located at the bottom right of the screen. This will create the route table with the specified name and associate it with the chosen VPC.
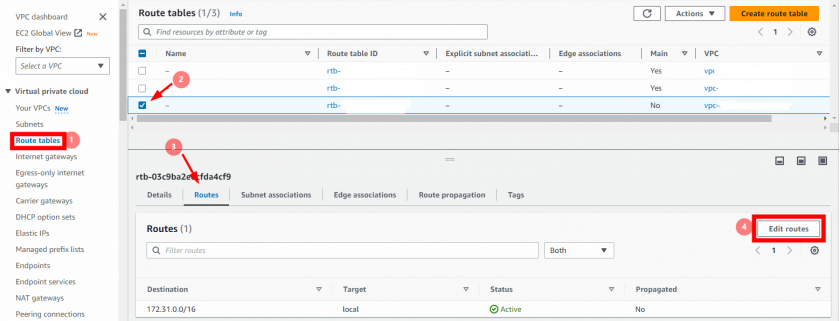
To select the created route table and access the route editing screen, in the VPC Dashboard, click on “Route Tables” in the navigation pane. Locate and select the desired route table from the list. In the “Routes” tab, click on the “Edit routes” button.
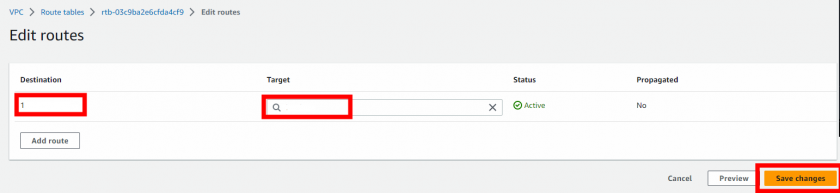
In the “Destination” field, enter “0.0.0.0/0” to allow all IP addresses.
In the “Target” field, select the Internet Gateway that you created in step (4).
Once you have set the destination and target, click on “Save routes” to save the changes.
By clicking on “Save routes,” the route with the specified destination and target will be added to the route table.
Go back to the “Route Tables” screen and select the route table you created.
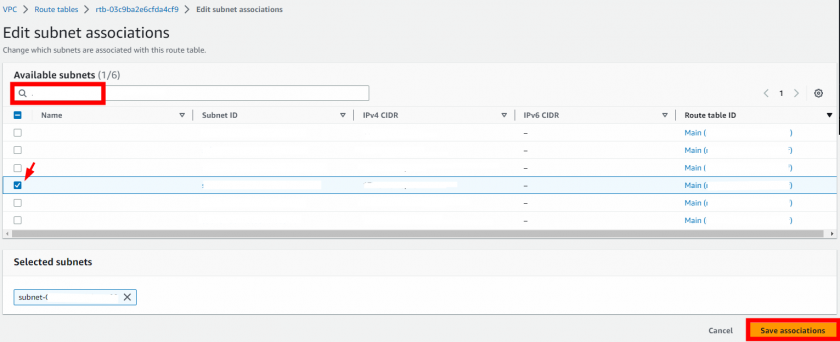
Click on “Subnet Associations” and then click on “Edit subnet associations” to open the subnet association editing screen.
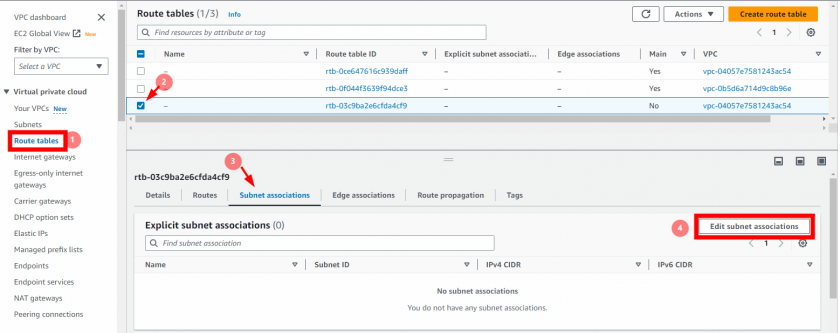
Select the subnet you created on step (3) and click on “save associations” on the bottom-right.
Conclusion
Great! You have now completed the explanation of the AWS network construction steps. Understanding the creation process and configuring elements such as subnets and route tables will enable you to design your own networking infrastructure. Use this knowledge to architect a robust and scalable network that meets your specific requirements.

