Transit GatewayでVPC間を接続方法
はじめに
Transit Gatewayは、大規模なネットワーク環境においてネットワークトラフィックのルーティングやセキュリティを効率的に管理するための重要なツールです。VPC間やVPCとオンプレミスネットワーク間の通信を簡単に確立し、トラフィックの集約やセキュリティポリシーの一元管理を実現します。
今回は、Transit Gatewayを使用してVPC間を接続する手法について詳しく解説します。
Transit Gatewayの構築手順
(1)Transit Gatewayの作成
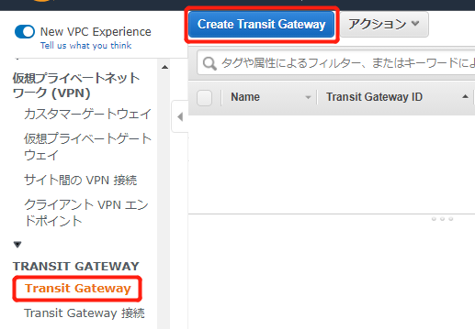
AWSマネジメントコンソール のサービスから「VPC」を選択し、VPCダッシュボードより「Transit Gateway」をクリックし、「Create Transit Gateway」をクリックすると、Transit Gatewayを作成する画面に移動します。
「Name tag」に任意の名前を設定し、VPNの設定は自身の環境に合わせて選択してください。associationとpropagationの自動作成を禁止するため、チェックを外してください。選択後、右下の「Create Transit Gateway」をクリックしてください。

「State」が「avaliable」になれば作成完了です。

(2)Transit Gateway ルートテーブルの作成
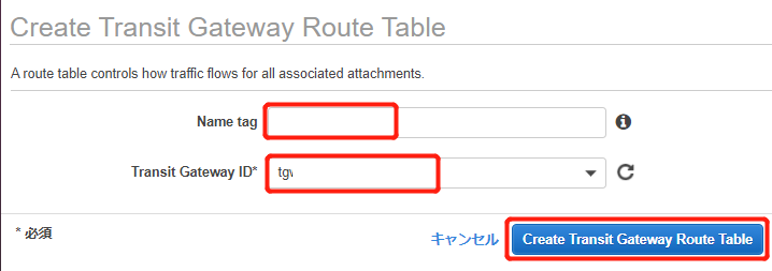
VPCダッシュボードより「Transit Gateway ルートテーブル」をクリックし、「Create Transit Gateway Route Table」をクリックすると、Transit Gateway Route Tableを作成する画面に移動します。

「Name tag」に任意の名前を設定し、「Transit Gatewag ID」 は手順(1)で作成したTransit Gatewayを選択してください。選択後、右下の「Create Transit Gateway Route Table」をクリックしてください。
(3)VPCからTransit Gatewayへの接続の作成
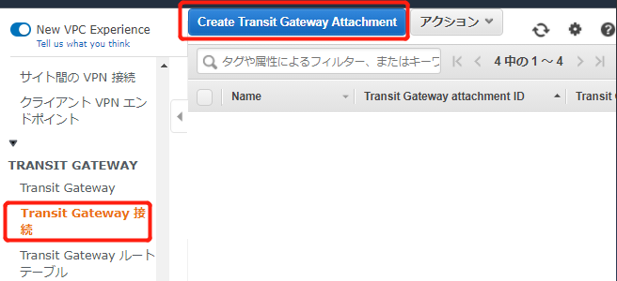
VPCダッシュボードより「Transit Gateway 接続」をクリックし、「Create Transit Gateway Attachment」をクリックすると、Transit Gateway Attachmentを作成する画面に移動します。
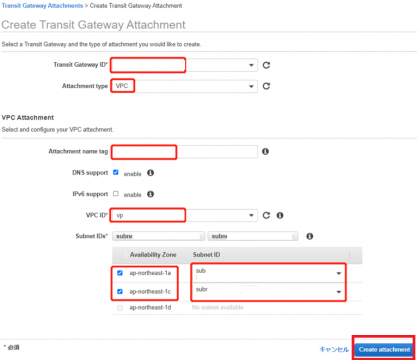
「Transit Gateway ID」は手順(1)作成したTransit Gatewayを選択し、「Attachment Type」はVPCを選択してください。「Name tag」に任意の名前を設定してください。VPC1と該当するアベイラビリティゾーンを選択し、ゾーンごとに任意のサブネットを選択してください。全部選択後、右下の「Create Attachment」をクリックしてください。
VPC2からの接続は同じように作成してください。
「State」が「available」になることを確認してください。

(4)associationの作成
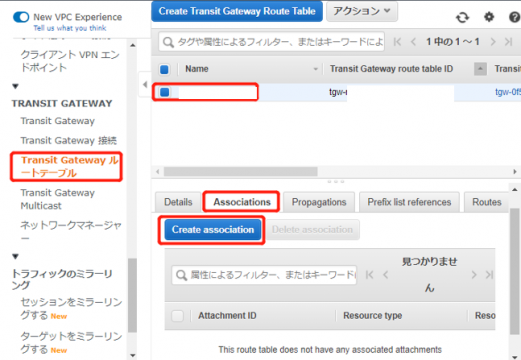
VPCダッシュボードより「Transit Gateway ルートテーブル」をクリックし、手順(2)で作成したTransitGatewayのルートテーブルを選択してください。「Associations」から「Create association」をクリックしてください。
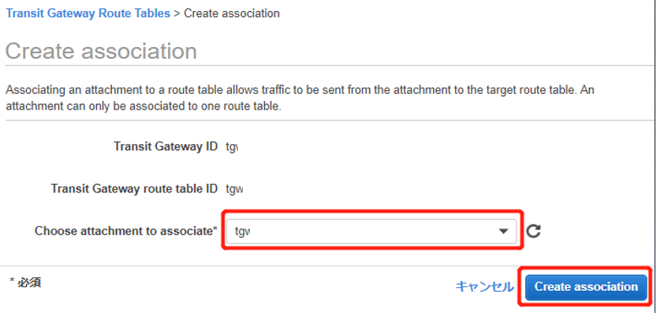
VPC1のattachmentを選択し、「Create association」をクリックしてください。
VPC2接続のassociationを同じように作成してください。
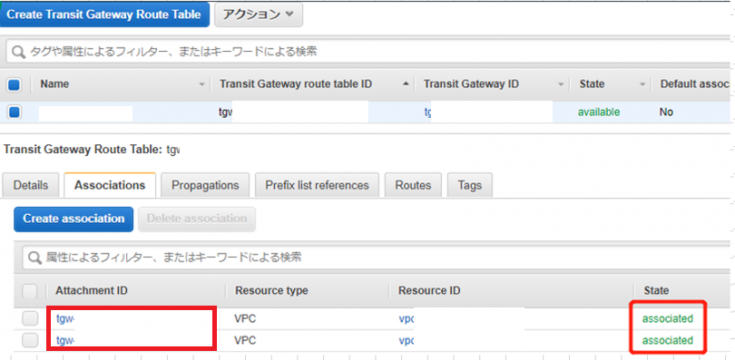
二つの「State」が「associated」になることを確認してください。
(5)propagationの作成
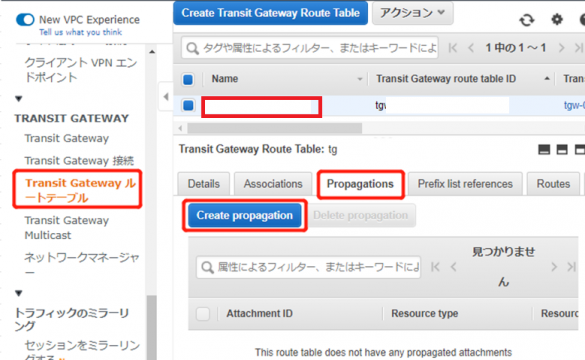
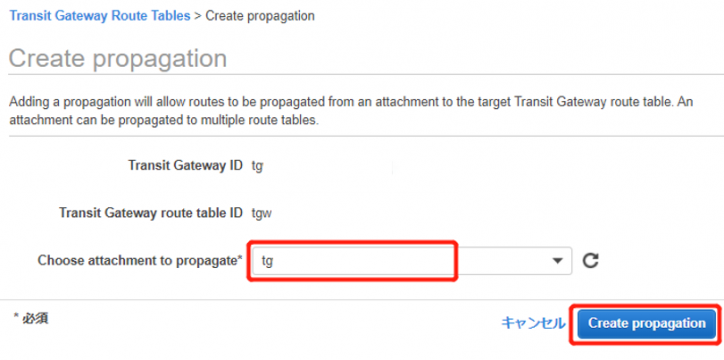
VPCダッシュボードより「Transit Gateway ルートテーブル」をクリックし、手順(2)で作成したTransitGatewayのルートテーブルを選択してください。「Propagations」から「Create propagation」をクリックしてください。
VPC1のattachmentを選択し、「Create propagation」をクリックしてください。
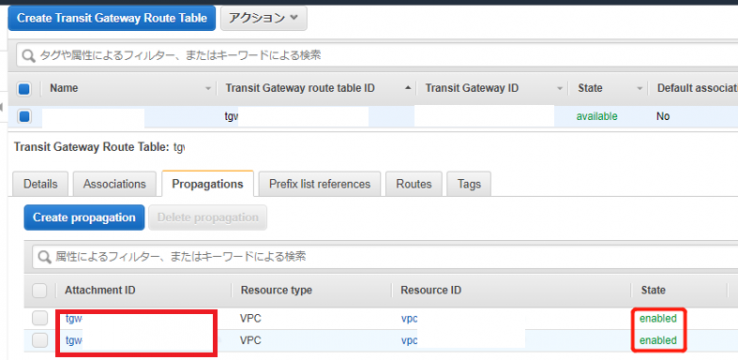
VPC2接続のpropagationを同じように作成してください。
二つの「State」が「enabled」になることを確認してください。
(6)ルート追加
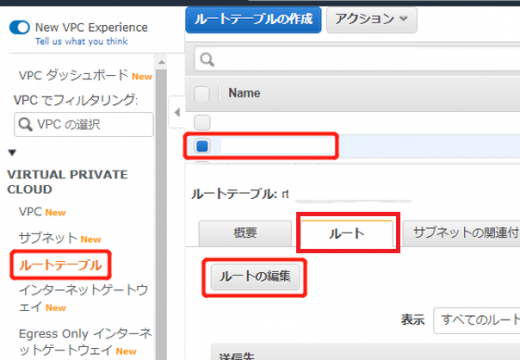
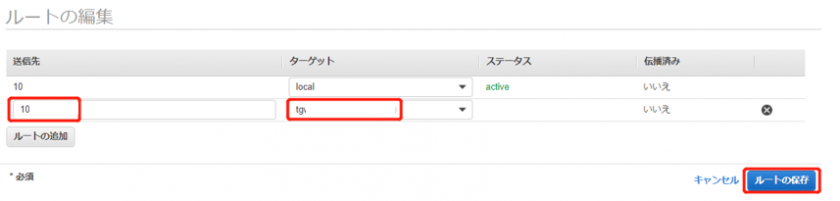
VPCダッシュボードより「ルートテーブル」をクリックし、VPC1のパブリックルートテーブルを選択してください。「ルート」から「ルートの編集」をクリックしてください。
VPC2のCidrを入力し、手順(1)で作成したのTransit Gatewayを選択してください。選択後、右下の「ルートの保存」をクリックしてください。

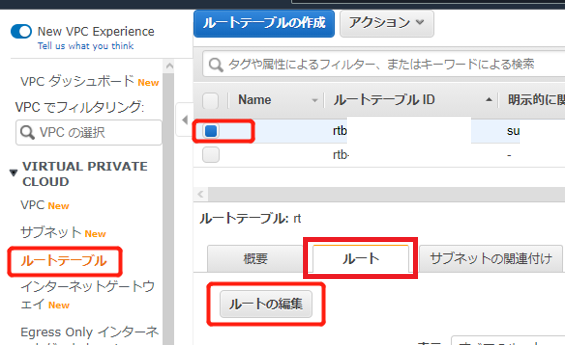
VPC2の任意のルートテーブルを選択してください。「ルート」から「ルートの編集」をクリックしてください。
VPC1のCidrを入力し、手順(1)で作成したのTransit Gatewayを選択してください。選択後、右下の「リートの保存」をクリックすると作成完了です。
終わりに
今回は、Transit Gatewayを使用してVPC間を接続する手法について詳しく解説しました。Transit Gatewayを活用することで、複数のVPCやオンプレミスネットワークを効率的に接続し、柔軟でスケーラブルなネットワーク環境を構築することができます。
ぜひ、自身のネットワーク環境においてTransit Gatewayを活用して、効果的なネットワーク接続を実現してください。

