How to mount an Elastic File System on EC2 instance
Introduction
EFS (Elastic File System) is a managed network file system that allows multiple EC2 instances to share files. In this blog post, we will provide a detailed explanation of the steps involved in mounting an EFS file system on multiple EC2 instances.
By using EFS, multiple EC2 instances can access the same file system and share data. This enables centralized management of content across multiple instances and facilitates the utilization of shared data.
Now, let’s take a look at the steps to mount an EFS file system on multiple EC2 instances.
Steps for building an EFS
(1) Creating a security group
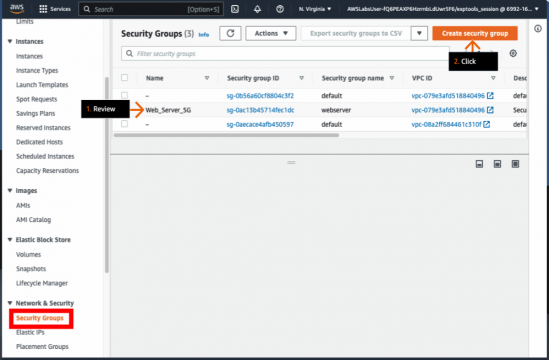
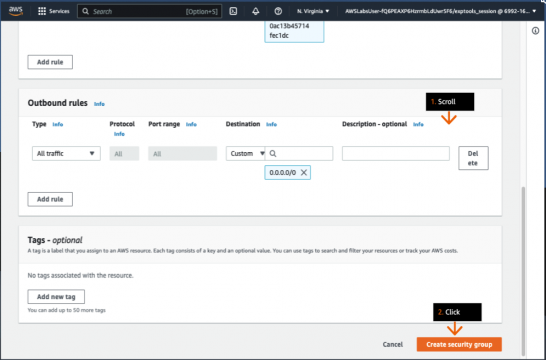
Select “EC2” from the services in the AWS Management Console, and then click on “Security Groups” in the EC2 dashboard. Click on “Create Security Group” to move to the screen for creating a security group.
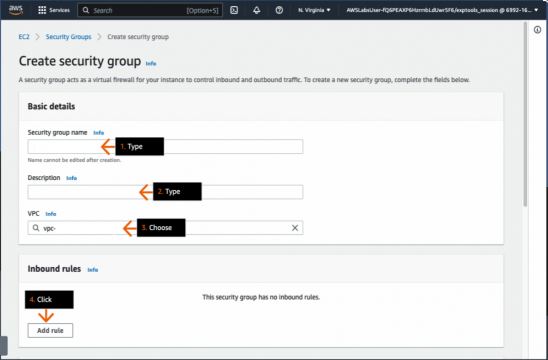
Enter the desired “Security Group Name” and “Description” based on your own requirements. For VPC, select the same VPC as the EC2 instances.
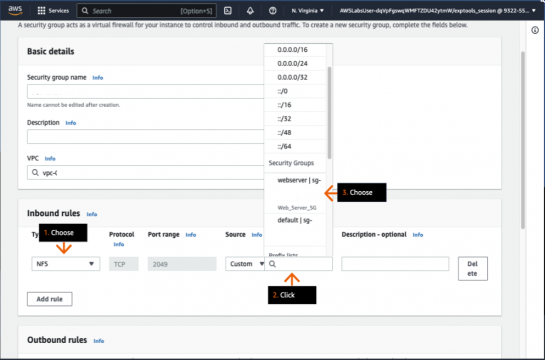
Choose port 2049 for “Port” and select “Custom” for “Source“, then enter the Security Group ID specific to each EC2 instance you obtained.
Next, set an arbitrary name in the “Name” tag, and click on “Create Security Group” to create the security group.
(2) Enable DNS Hostname
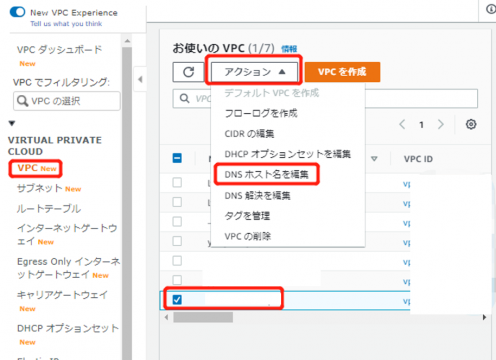
Select “VPC” from the services in the AWS Management Console, then click on “VPC” in the VPC Dashboard. Choose the relevant VPC, and from the top-left corner, click on “Actions” and select “Edit DNS Hostnames“.
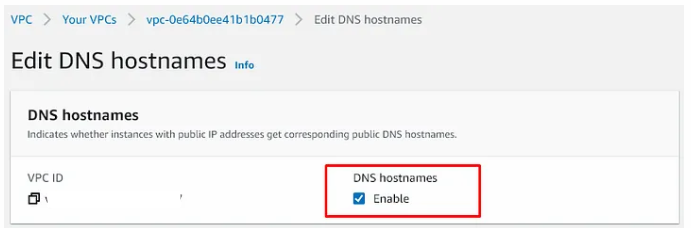
Enable DNS hostnames and click on “Save changes” at the bottom-right corner to save the changes.
(3) Creating an EFS file system
From the EFS dashboard, click on “File systems” and then click on “Create file system” at the top-right corner to go to the file system creation page.


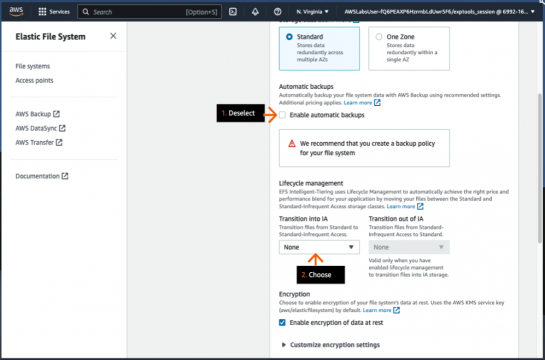
Click on “Customize” on the bottom-right.
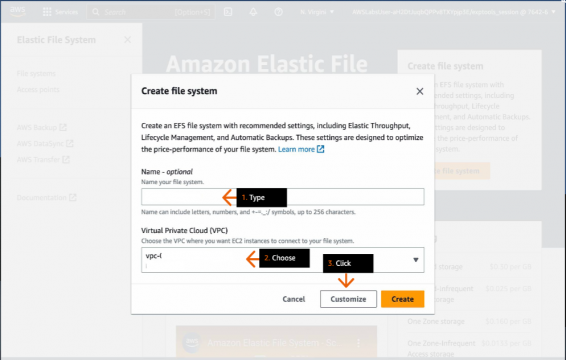
Set a desired name for “Name – Options” and configure “Automatic backups” according to your own environment.
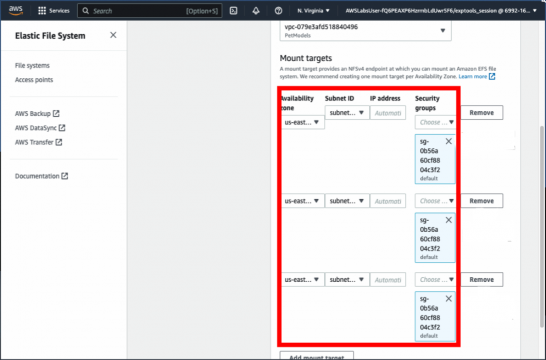
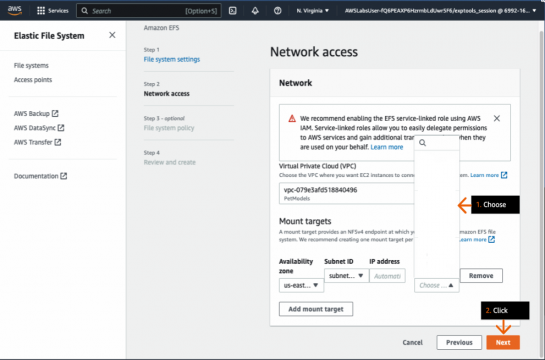
Select the corresponding VPC, Availability Zone, Subnet, and the security group of the EFS created in step (1), then click “Next“.
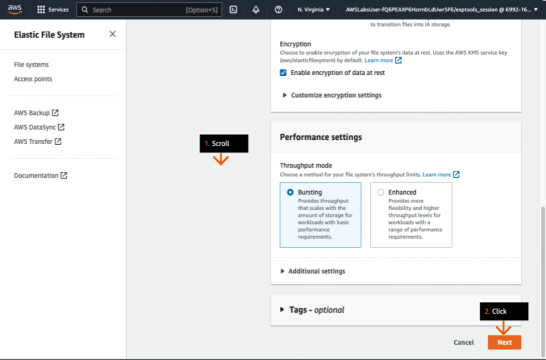
Click “Next” again.

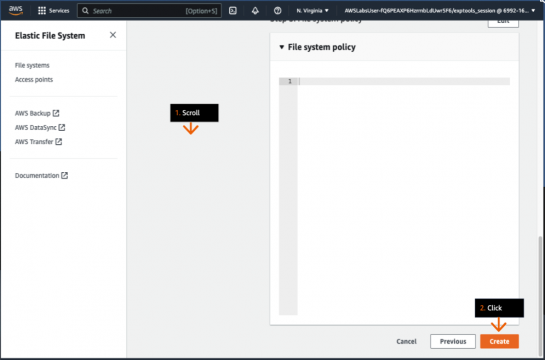
Check all information on the following screen, if everything is alright, click on “Create“.
(4) Mounting to EC2
Use the following commands in Tera Term to connect to the corresponding EC2 instance:
- Install the tool for connecting to EFS:
sudo yum install -y amazon-efs-utils- Prepare a folder:
sudo mkdir [directory-to-mount]- Mount the EFS:
sudo mount -t efs [file-system-id]:/ [directory-to-mount] Replace [directory-to-mount] with the directory path you want to mount and [file-system-id] with the actual file system ID of your EFS.
Conclusion
In this blog post, we provided a detailed explanation of how to mount an EFS file system on EC2 instances. By using EFS, you can easily share files among multiple EC2 instances and ensure data consistency and availability.
EFS file system is a critical tool for data sharing and application scaling. We encourage you to refer to this blog post and explore the ways to leverage EFS in your own projects and applications.

