How to build an Amazon Relational Database
Introduction
In this article, we will explain in detail the steps for building an Amazon Relational Database (RDS). RDS is a very easy to use managed database service, and supports major relational database engines such as MySQL, PostgreSQL, Oracle, etc.
By understanding the steps for building an AWS RDS, you will get all necessary knowledge to use the powerfull features of databases!
AWS RDS bulding steps
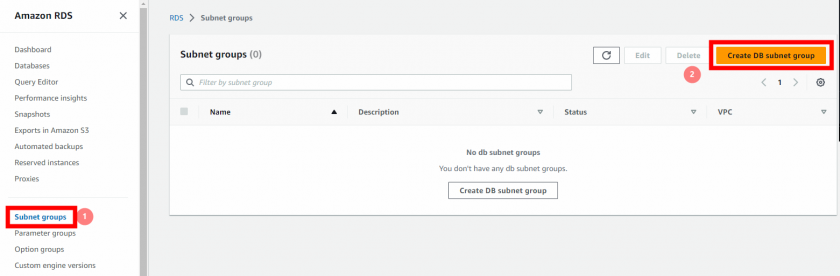
(1)Making a subnet group
Click on “Subnet groups” on the left part of your screen. Then on the top right, click on “Create DB subnet group” to move to the DB subnet group setting screen.
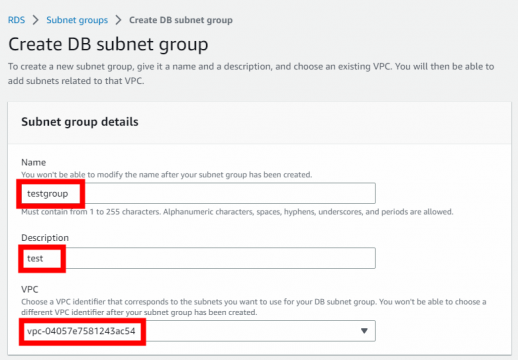
Enter a suitable name and description for the DB subnet group based on your purpose.
Next, select the appropriate VPC for the subnet group.
Specify two availability zones for the subnet group.
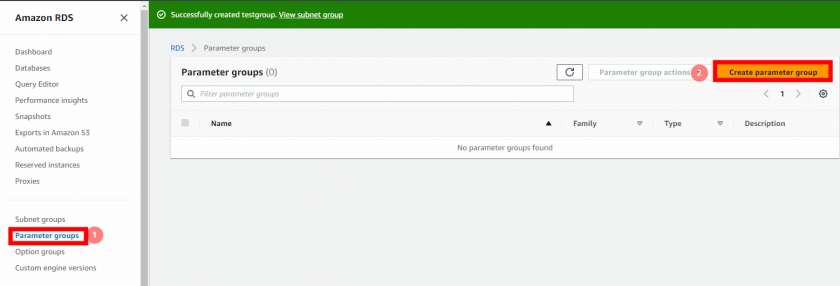
Once you have configured the settings, click on “Create” to create the DB subnet group.
Please note that the specific details for naming, VPC selection, and availability zone selection will depend on your requirements and the setup of your AWS environment.

(2)Setting parameter groups
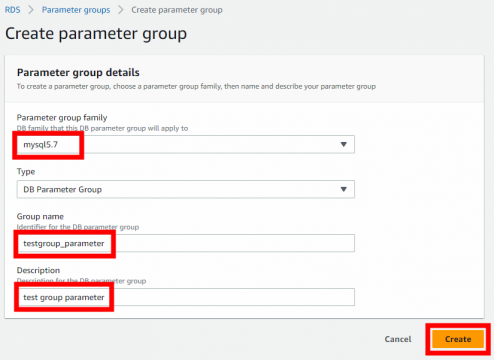
Click on “Parameter groups” on the left part of the screen, then on “create parameter group” on the top right.
Choose the appropriate DB engine version by selecting the desired “Parameter Group Family” based on your environment.
Enter a suitable name and description for the parameter group based on your purpose.
Please provide a meaningful name and description to ensure clarity and easy identification of the parameter group.
Remember, the available options for the parameter group family and the specific naming and description details will depend on the DB engine and version you have chosen, as well as your specific requirements.
(3)Making a database
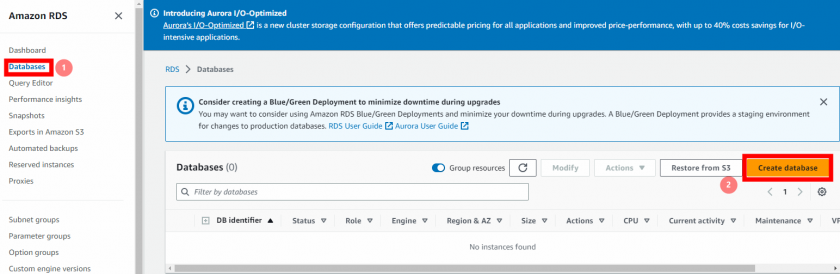
Click on “databases” then on “create database” on your screen.
To choose the appropriate settings for database creation, please consider the following steps based on your environment:
- Select the desired “Database creation method” based on your requirements. You can choose options like “Standard Create” or “Easy Create” depending on the level of customization you need.
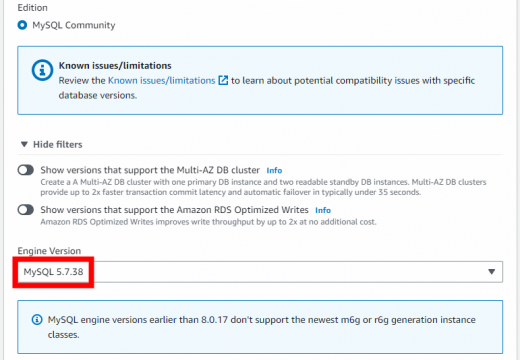
- Specify the “Engine type” that matches the database engine you intend to use, such as MySQL, PostgreSQL, Oracle, or others.
- Choose the appropriate “Version” of the database engine that suits your needs. Select the specific version number or the latest available version.
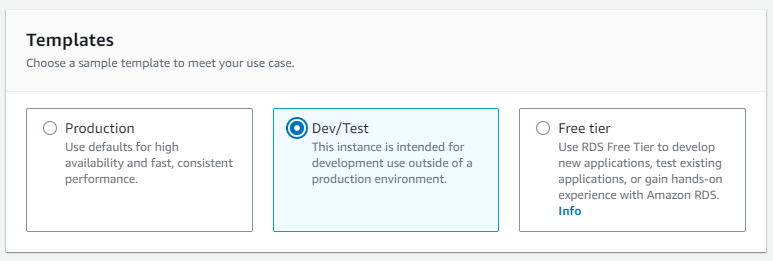
- Select a “Template” if applicable, which provides predefined configurations and settings for your database. Choose the one that aligns with your requirements.
Please note that the available options for engine types, versions, and templates may vary based on the RDS service and region you are using. Ensure you choose the options that best suit your specific environment and use case.

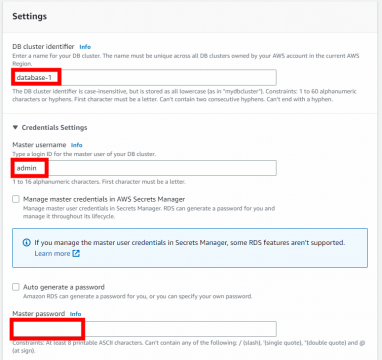
Enter a unique “DB instance identifier” that will be used to identify your database instance.
Provide a “Master username” for the database.
Set a secure “Password” for the master user.
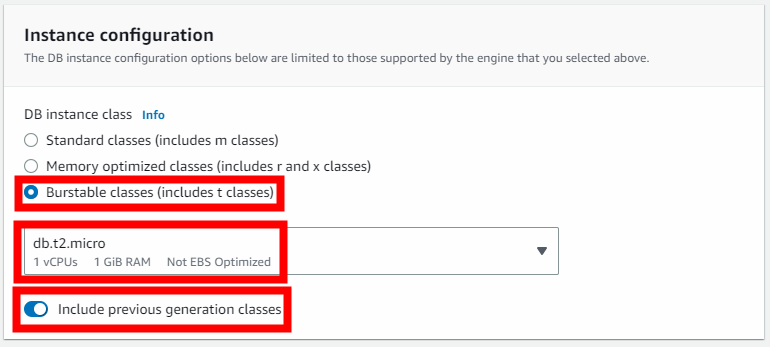
Choose the DB instance size as “db.t3.micro” which is a burstable and cost-effective option.
Keep the option “Include previous generation classes” enabled if required.
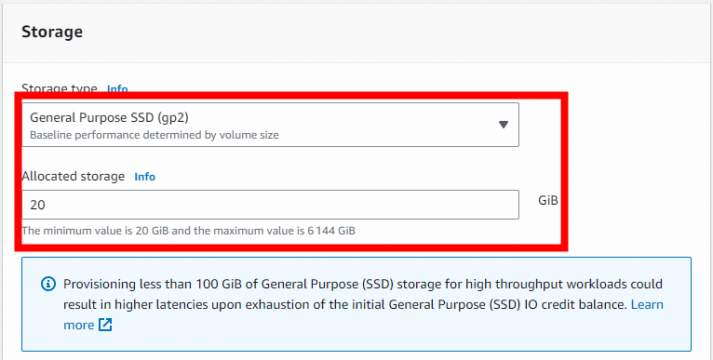
Select the appropriate “Storage type” and specify the desired “Storage allocation” based on your needs and preferences.
Please note that the available options for storage type and allocation may vary depending on the database engine and other factors. Make sure to select the options that align with your requirements and budget.
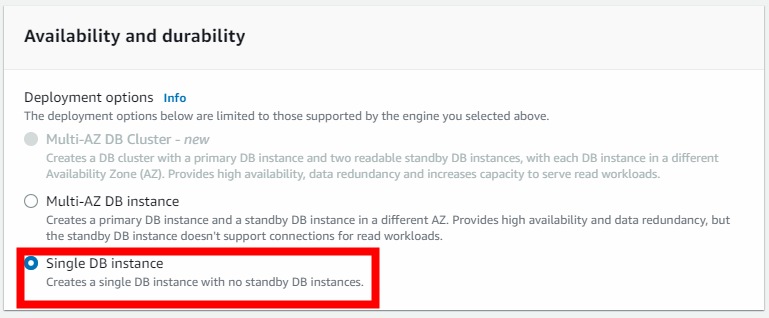
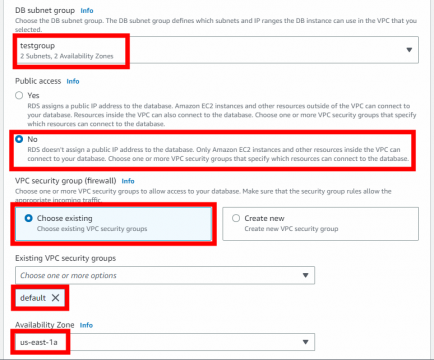
To configure availability and durability settings, please follow these steps:
- Select the option for “Multi-AZ” configuration based on your requirements. Since you won’t be configuring Multi-AZ for practice purposes, choose the availability zone “ap-northeast-1a” for this instance.
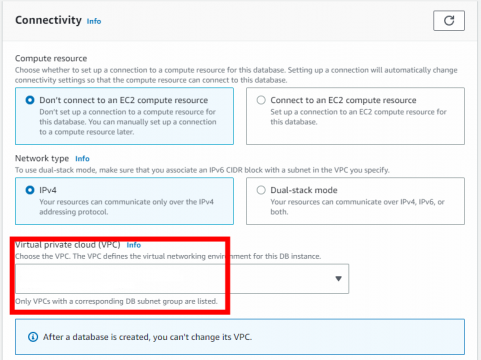
- Choose the appropriate VPC for the database instance.
- Select the subnet group you created in step (1) from the available options.
- Specify the appropriate security group to ensure the necessary network access and security for the database.
Make sure to review your selections carefully to ensure they align with your desired configuration and requirements.
Select the DB parameter group you just made during step (2).
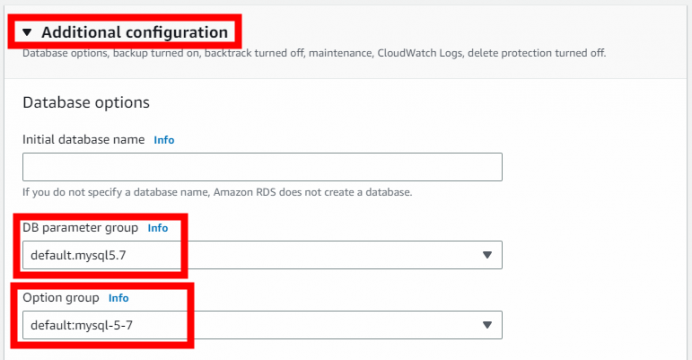
You can just leave everything else with the default settings and scroll all the way down to the “Create database” button on the bottom right.
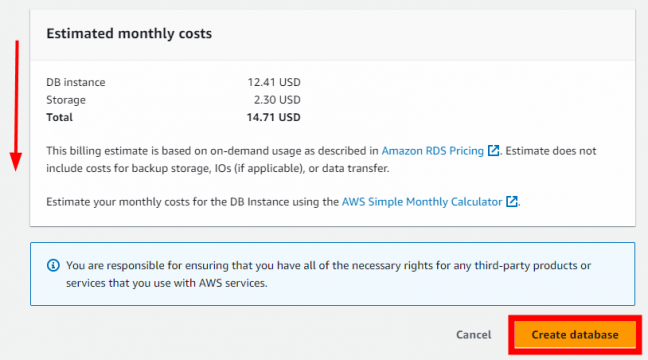
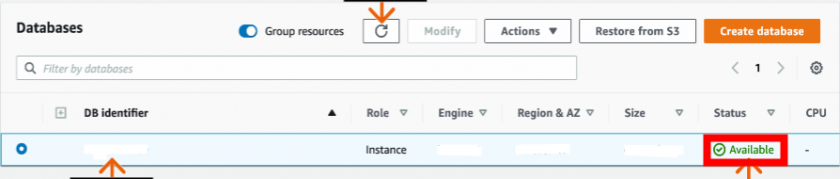
Back to the database screen, if you see “✅Available” under status, congratulations, you just created your RDS!
Conclusion
In conclusion, RDS is a powerful managed database service and an essential tool for improving application performance, availability, and security.
With the advantages and flexibility of AWS RDS, you are now ready to build a database solution that meets the requirements of your applications and business. Furthermore, you can leverage other AWS services to create more advanced architectures and enhance your overall infrastructure.

