How to connect VPCs using Transit Gateway
Introduction
Transit Gateway is an important tool for efficiently managing network routing and security in large-scale network environments. It allows an easy establishment of communication between VPCs, and between VPCs and on-premises networks, enabling traffic aggregation and centralized management of security policies.
In this guide, we will provide a detailed explanation of how to connect VPCs using Transit Gateway.
How to built a Transit Gateway
(1) Creating a Transit Gateway
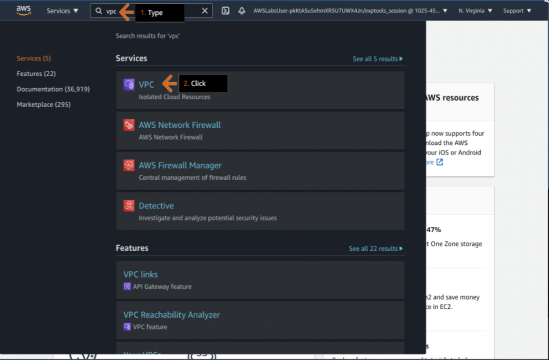
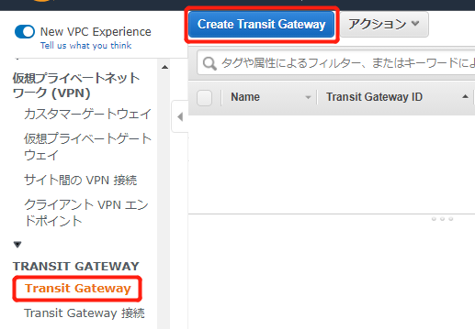
Select “VPC” from the services menu in the AWS Management Console. From the VPC dashboard, click on “Transit Gateway“. Click on “Create Transit Gateway” to proceed to the Transit Gateway creation page.
Set an arbitrary name in the “Name tag” field, and choose the VPN settings according to your environment. Uncheck the options for automatic association and propagation creation to disable them. After making your selections, click on “Create Transit Gateway” at the bottom right.

If the “State” turns into “Available“, the creation in complete.

(2) Creating a Transit Gateway Route Table
From the VPC dashboard, click on “Transit Gateway Route Tables” and then click on “Create Transit Gateway Route Table” to navigate to the page for creating a Transit Gateway Route Table.

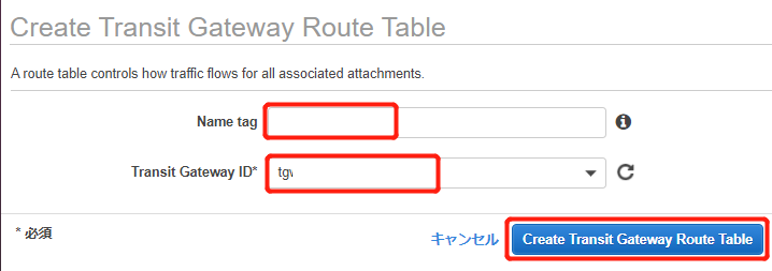
Set any desired name for the “Name tag” field, and select the Transit Gateway you created in step (1) for the “Transit Gateway ID“. Once selected, click on “Create Transit Gateway Route Table” at the bottom right.
(3) Creating a connection from VPC to Transit Gateway
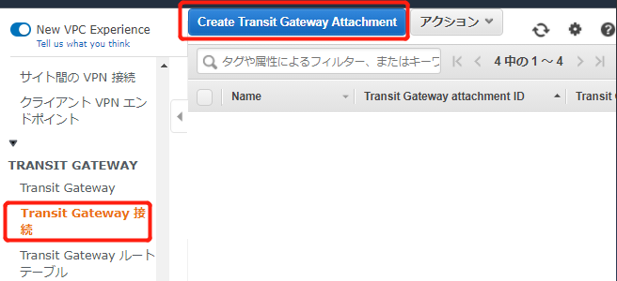
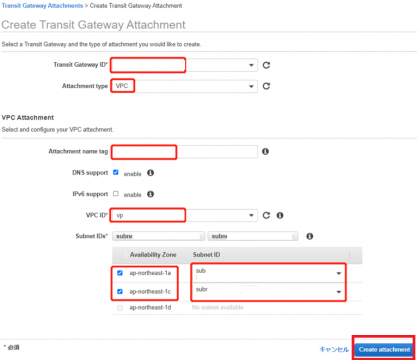
Click on “Transit Gateway Attachments” from the VPC Dashboard, and then click on “Create Transit Gateway Attachment” to proceed to the Transit Gateway Attachment creation screen.
For the “Transit Gateway ID“, select the Transit Gateway created in step (1). Choose “VPC” for the “Attachment Type“. Set an arbitrary name for the “Name tag“. Select the relevant Availability Zone and choose any desired subnet for each zone in VPC1. Once everything is selected, click on “Create Attachment” in the bottom right corner.
Similarly, create the connection from VPC2 following the same steps.
Please make sure that the “State” becomes “Available“.

(4) Creating an Association
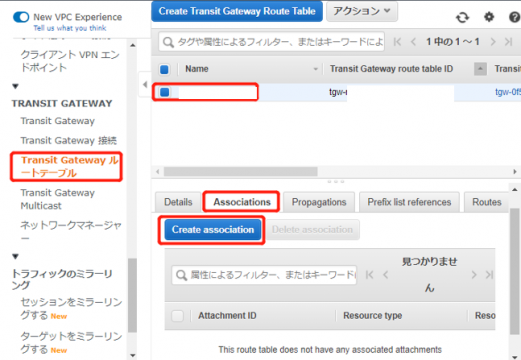
From the VPC Dashboard, click on “Transit Gateway Route Tables“, and select the route table associated with the Transit Gateway created in step (2). Under “Associations“, click on “Create association“.
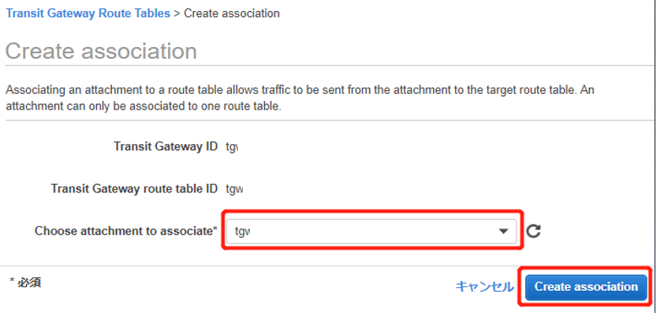
Select the attachment for VPC1 and click on “Create association“.
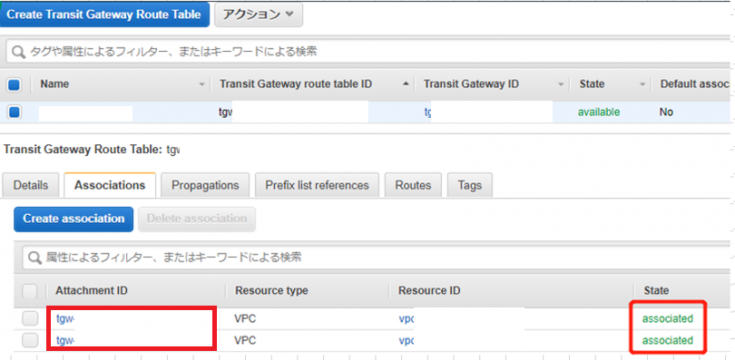
Please create the association for VPC2 connection in the same way.
Check that both of the “States” turned to “Associated“.
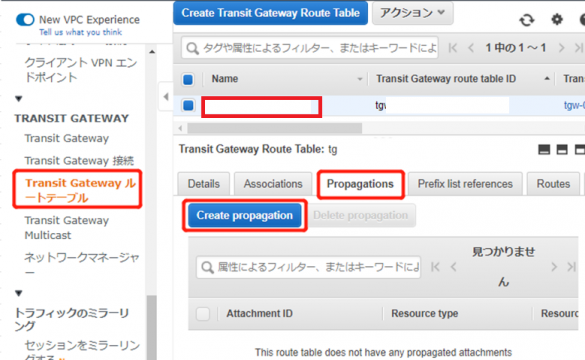
(5) Creating a propagation
Click on “Transit Gateway Route Tables” in the VPC Dashboard, and select the route table of the Transit Gateway created in step (2). Then, click on “Create propagation” under “Propagations“.
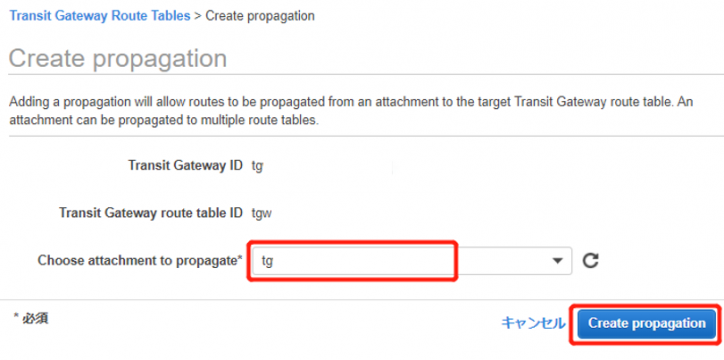
Select the attachment for VPC1 and click on “Create propagation” and create the propagation for the VPC2 connection in the same way.
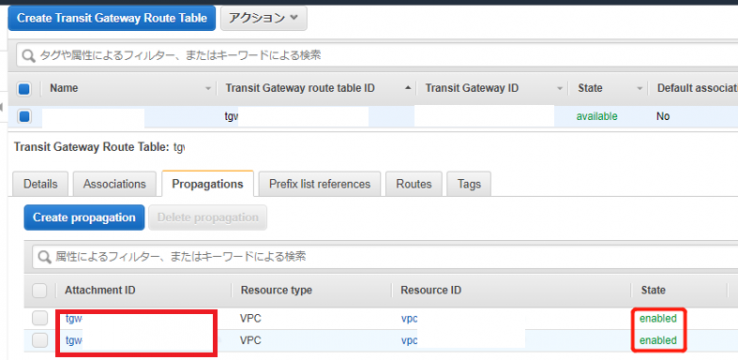
Make sure the two “States” are now “Enabled“.
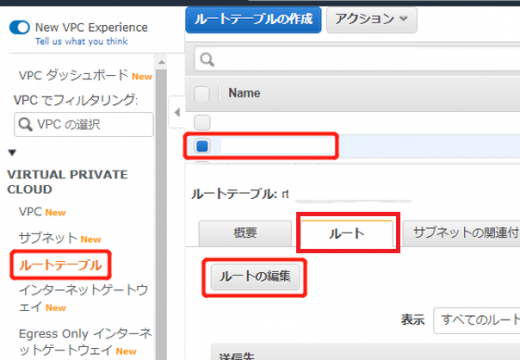
(6) Adding a route
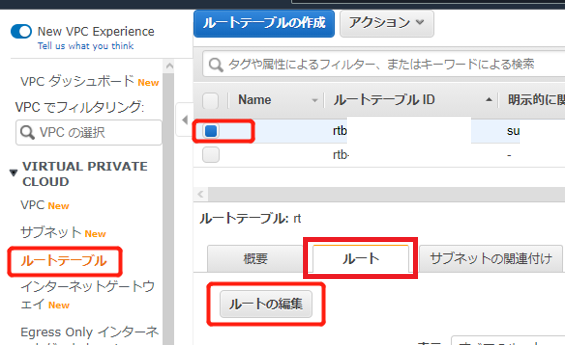
Click on “Route Tables” in the VPC Dashboard and select the public route table for VPC1. From the “Routes” tab, click on “Edit routes“.
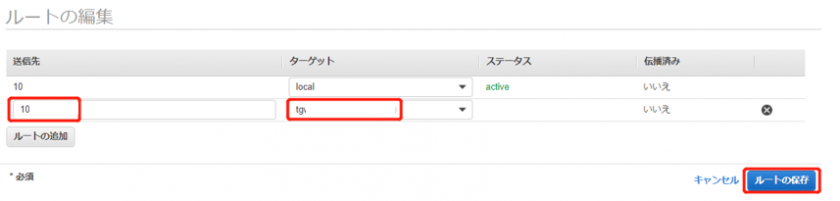
VPC2のCidrを入力し、手順(1)で作成したのTransit Gatewayを選択してください。選択後、右下の「ルートの保存」をクリックしてください。

Enter the CIDR block for VPC2 and select the Transit Gateway created in Step 1. After selecting, click on “Save routes” at the bottom right.
Enter the CIDR block for VPC1 and select the Transit Gateway created in Step 1. After selecting, click on “Save routes” at the bottom right to complete the creation.
Conclusion
We have provided a detailed explanation of how to use Transit Gateway to connect VPCs. By leveraging Transit Gateway, you can efficiently connect multiple VPCs and on-premises networks, allowing you to build a flexible and scalable network environment.
We encourage you to make use of Transit Gateway in your own network environment to achieve effective network connectivity.

