How to connect VPCs using VPC Peering
Introduction
VPC peering is used to establish a secure and private connection between VPCs,. In this blog post, we will provide a detailed explanation of the steps involved in setting up VPC peering.
By utilizing VPC peering, you can enable routing of network traffic between VPCs and easily share resources and data. This simplifies network architecture in applications with multiple VPCs or in multi-tenant environments.
Now, let’s dive into the step-by-step process of connecting VPCs using VPC peering!
Steps for creating a VPC Peering connection
(1) Creating a VPC Peering(for the same account)
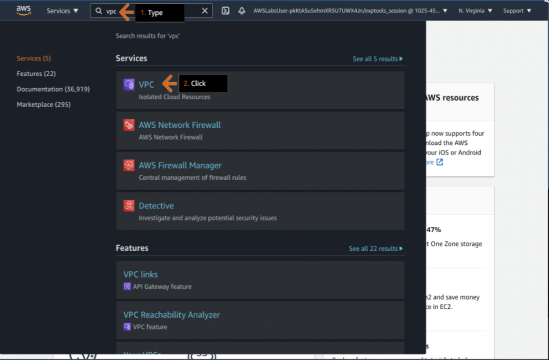
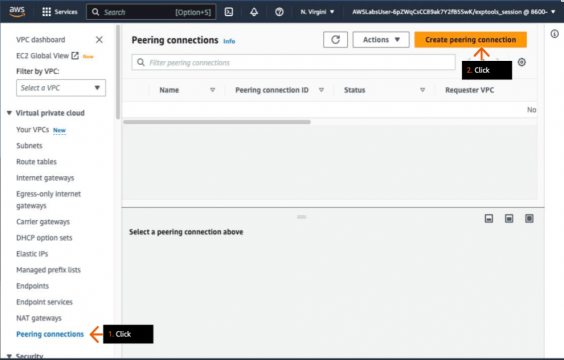
From the AWS Management Console, select the “VPC” service. In the VPC dashboard, click on “Peering Connections” and then click on “Create Peering Connection“. This will take you to the screen for creating a peering connection.
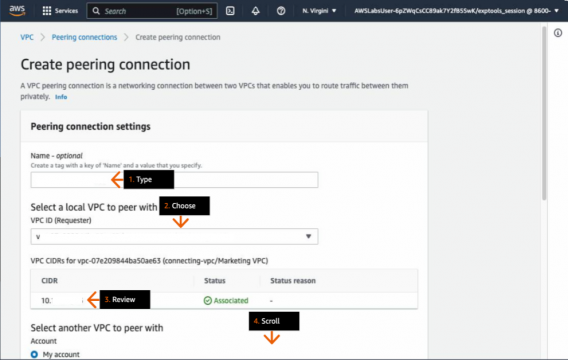
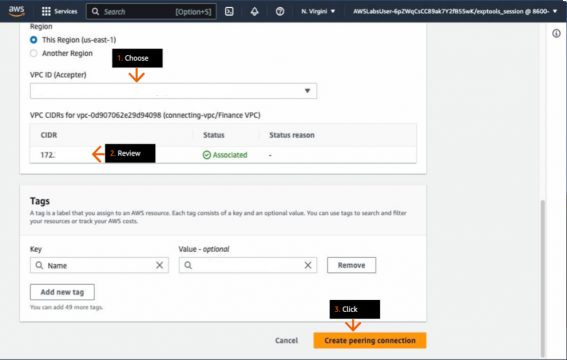
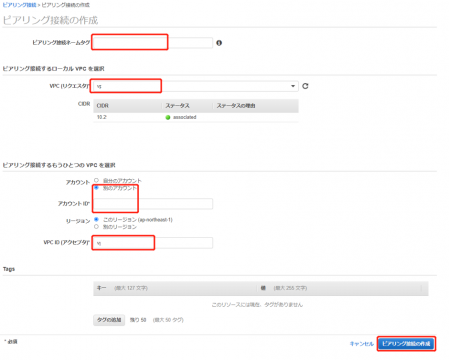
Set an arbitrary name for the “Peering Connection Name Tag” and select the VPC1 and VPC2 that you want to establish the peering connection between. Once selected, click on “Create Peering Connection” at the bottom right.
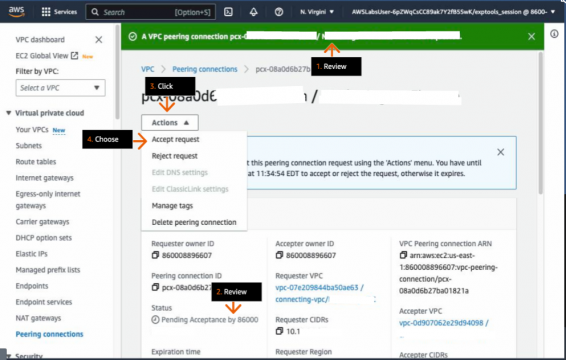
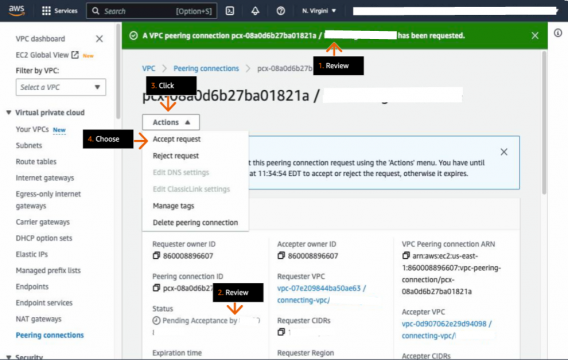
If the “Status” is “Pending acceptance“, select “Actions” in the top-left corner. Then click on “Accept Request” to approve the peering connection request.
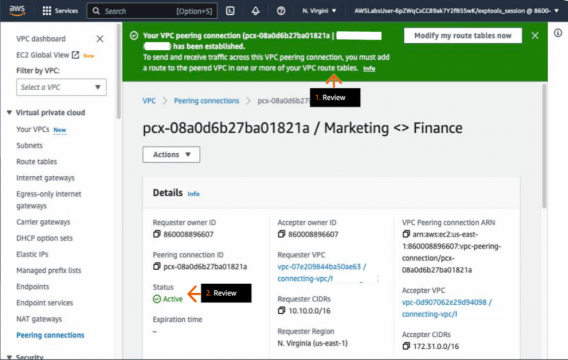
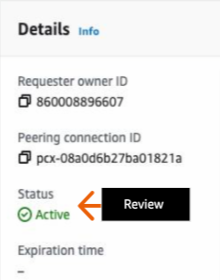
Once the “Status” changes to “Active,” the peering connection has been successfully established. This indicates that the VPC peering setup is complete and the VPCs are now connected and able to communicate with each other securely.
(2) Creating a VPC Peering(for differen accounts)
Click on “Create Peering Connection” following the same steps as in Step (1).
Please enter a name for the “Peering Connection Name Tag” and select VPC1 in Account 1. Then, enter the “Account ID” for Account 2 and select VPC2 in Account 2. After making the selections, click on “Create Peering Connection” at the bottom right.
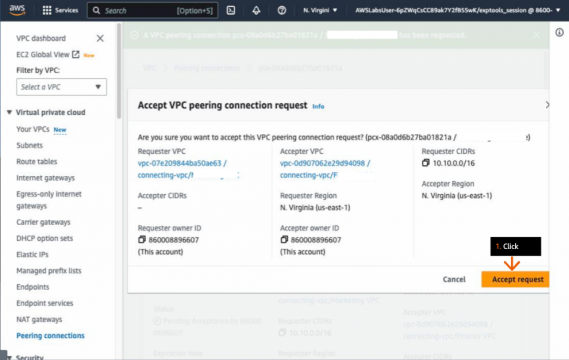
Navigate to the VPC console in Account 2. If the “Status” shows as “Pending Acceptance“, click on “Actions” and then click on “Accept Request” to accept the peering connection request.
Please verify that the “Status” for both Account 1 and Account 2 is “Active” to ensure that the peering connection is successfully established.
(3) Adding routes
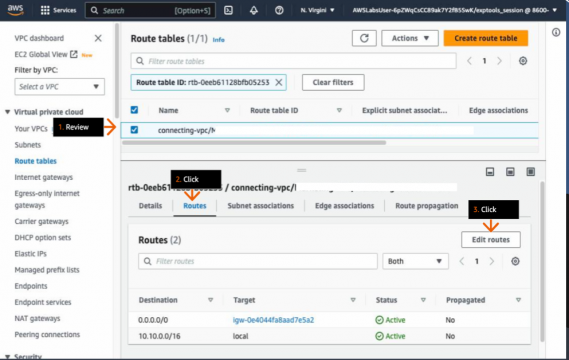
Please go to the VPC dashboard and click on “Route Tables“. Select the public route table for VPC1, and click on “Routes” followed by “Edit routes“.
Enter the CIDR of VPC2 and select the peering you created in step (2). After selecting, click on “Save changes” at the bottom-right.
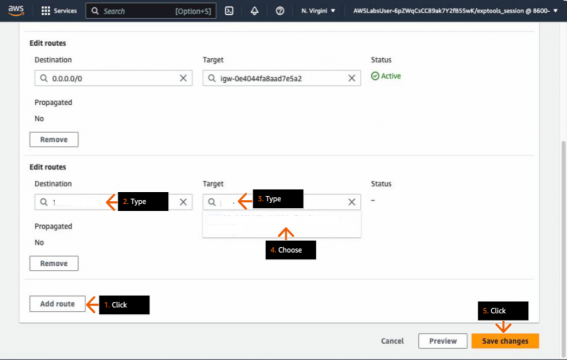
Select the desired route table in VPC2 according to your environment. Then, click on “Routes” and select “Edit routes“.
Enter the Cidr of VPC1 and select the peering connection created in step (2). After selecting, click on “Save changes” at the bottom right to complete the setup.
Conclusion
In this guide, we provided detailed instructions and benefits of VPC peering. We hope that this information will help you make the most of VPC peering in your own projects and applications.

